SmartPABX™ Web Interface
Admin Web Interface
The admin web interface allows full control to configure everyfeature of the SmartPABX. The admin user is able to access andmodify every section of the SmartPABX, including listening to storedcall recordings. The admin username and password should generallyonly be issued to a single manager who is responsible for the managementof your SmartPABX.
User Web Interface
The user interface gives access to only some features of theSmartPABX related to the extension that is logged in at the time. Eachextension on your SmartPABX is able to login to the user webinterface, simply by using their 4 digit extension number as theusername, and their SIP password as the password.
Click-to-Dial Phone Directories
While logged into the user web interface, users may take advantageof the “click-to-dial” functionality built into this interface. Thereare two different contact directories where users can store contactdetails. The phone numbers for each of these contact records then turnsinto a click on link. Clicking on the link automatically triggers a callto the number you click on.There are two different contact directories available to the user:Personal and SharedThe personal directory is accessible only by that extension.The shared directory is accessible by all extensions on the SmartPABX.
Web Interface Overview
Your SmartPABX™ system gives you full control of itsconfiguration via an easy to use Web Interface. The Web Interfacesupports two different levels of permissions: admin and user
Feature Codes
List of Feature Codes
Your SmartPABX is pre-programmed with a number of “feature codes”. These feature codes can be dialled from your handset.
Each “feature code”, as well as a description is listed below:

Configure Extensions
Extension Overview
Extensions should be allocated for each telephone handset that will be connected to the SmartPABX. For example, if you have 10 telephone handsets, you will need to create 10 different extensions within the SmartPABX for your 10 phones.
Extension numbers are 4 digit numbers and are allocated to each extension automatically when they are created. The first extension that you create will be automatically allocated with extension number 9001, and additional extensions will be allocated with 9002, 9003, 9004 and so on.
Once you have created your extensions in the SmartPABX, and have configured and connected your telephone handsets to the SmartPABX, users of those telephone handsets will be able to call other users by dialling their 4 digit extension number.
Creating a new Extension
To create a new extension, login to your SmartPABX web interface and complete the following steps:
- Click on the “Configure Extensions” menu option
-
At the bottom of that page, click on the “Click here to add a new extension” button
- You will be presented with a page similar to the image displayed in figure 1.1

When you have completed all fields, click on the “Add new Extension Number 9XXX” button to create the new extension. An explanation of each field follows.
Description of Extension Options
Extension Number
The extension number field contains the 4 digit extension number (allocated automatically) for the extension you are creating. It is not possible to change this value.
The extension number that is allocated becomes the registration username for the SIP handsets that connects to this extension.
Extension Password
The extension password field contains the password for the extension number you are creating. This field will be populated automatically with a randomly generated password. It is possible to change this password if required.
The password that is allocated becomes the registration password for the SIP handset that connects to this extension.
IMPORTANT NOTE: If you change the password to a custom password it is very important to use a secure password that contains a mixture of letters and numbers and is at least 6 characters long. Care should be taken to ensure that this password is kept in a safe and secure place.
Extension Comment
The extension comment field is used as a descriptive field to label the extension either by the users name. This field should contain the users first name and surname, separated by a space. This field is also used by the Corporate Directory feature. This field accepts all characters.
Concurrent Call Limit
The concurrent call limit field describes the number of concurrent calls permitted for that extension, ranging from 1 through to 10.
If you require the ability for your users to place callers on hold while attending to other calls, you must set this value to at least 2. The default value for this field is 2.
Extension Context
The extension context field is primarily used to suspend extensions. Normally this would be set to “Active”. In the case where you wish to prevent an extension from being able to make or receive telephone calls, you should set this field’s value to “Suspended”.
Extensions that are “Suspended” are unable to make or receive calls, and their telephone handsets will also be unable to register to the SmartPABX.
Send inbound to Ring Group
This option is used to redirect the extensions inbound calls to a ring group (which can ring on multiple telephones). If this option is enabled, inbound calls to this extension number will dial the ring group selected. The call will ring on all telephones in that ring group, until the call is answered. This feature is sometimes referred to as single number reach.
To use this option you must first create a “Ring Group” (see “Configure Ring Groups”), and define the members of that ring group. After you have created the ring group, it will then be possible to select that ring group from the “Dial Ring Group” drop down menu box.
To disable this functionality, set the “Dial Ring Group” value to “N/A” from the drop down menu box.
IMPORTANT NOTE: Inbound calls to the extension that are initiated either from a Queue, IVR, or another Ring Group will not dial the specified Ring Group and will instead dial the extension directly. This behaviour is intended.
Ringtime
The ringtime field is used to define the length of time that inbound calls to this extension will ring for, before either being diverted to voicemail (if voicemail is enabled), or the call being terminated (if voicemail is disabled).
Outbound Caller ID
The outbound caller ID field is used to define the Caller ID number that will appear on outbound PSTN calls. This option can either be set to “Private”, if you wish your caller ID to be withheld, or can also be set to one of your Direct Indial numbers that are associated with your SmartPABX.
Please note that this field is not used for internal (extension to extension) calls, and is only relevant for external PSTN calls. Internal calls between extensions will always show the 4 digit extension number of the caller as the Caller ID.
Queue Membership
The queue membership field is used to add an extension into a relevant queue. Queues must first be defined (see ‘Configure Queue’ section on page 27).
Destination if no answer
The destination if no answer field is used to define where to route an inbound call if unanswered, after the ‘Ringtime’ has expired. There are three available options, as shown below.
-
GotoVoicemail (default setting)
-
GotoIVR
- Hangup
Voicemail
The voicemail field is used to either enable or disable voicemail for this extension.
If voicemail is enabled, inbound calls to this extension will firstly ring for the number of seconds defined in the “Extension Ringtime” field, and will then divert to voicemail.
If this user of this extension is already on a phone call, and they do not have call waiting turned on in their telephone handsets, inbound calls to this extension will divert to voicemail immediately.
If voicemail is disabled, inbound calls to this extension will firstly ring for the number of seconds defined in the “Extension Ringtime” field, and will then terminate (i.e. hangup) the call.
If voicemail is enabled, both the “Voicemail Password” and “Email Voicemails To” field must be set.
If voicemail is disabled, both the “Voicemail Password” and “Email Voicemails To” fields are not required to be set.
Voicemail Password
The voicemail password field is used to set the password for this extensions mailbox. The password should be between 3 and 6 characters long, and should be numeric characters only.
If voicemail is disabled this field should be left empty.
Email Voicemails To
The “Email Voicemails To” field is used to set the email address of the user of this extension. When voicemails after left for this user, the voicemails are converted into a WAV audio file and instantly emailed to this email address defined in this field.
If voicemail is disabled, this field should be left empty.
Add to Corporate Directory
If this option is selected, this user is added to the Corporate Directory. The Corporate Directory presents a caller with a directory of extensions from which they may select by name.
To use the Corporate Directory feature please ensure that all users have recorded their name, by logging into voicemail, navigating to ‘’mailbox options”, and selecting the option to record your name.
The Corporate Directory can be accessed internally by dialling 500. The Corporate Directory can also be accessed by external callers, by configuring an IVR to connect the caller to the Corporate Directory (see “GotoDirectory” action of IVR).
Record Calls
The Record Calls field is used to define whether or not calls to and from this extension are recorded.
If this option is enabled, all calls to and from this extension number will be recorded. If this option is disabled, calls to and from this extension number will not be recorded. *
- Note that regardless of what this option is set to, if inbound calls to this extension are initiated from an IVR, then this field is ignored and the recording options for the IVR are instead used. For example, if extension 9001 has call recording disabled, but is receiving calls initiated from an IVR (using the “Dial” action within the IVR) and that IVR has recording enabled, then this users inbound calls from this IVR would be recorded.
IMPORTANT NOTE: Legal requirements regarding recording of telephone calls vary depending on where the calls are being made to and from. Please research the legal requirements and ensure that you comply before enabling call recording.
Forward Calls To
The “Forward Calls To” field is used to forward (redirect) inbound calls arriving on this extension to another single number. The number being forwarded to can either be a 4 digit extension number, or can also be a regular 10 digit PSTN number.
Please note that calls are only forwarded if the caller has dialled that extension directly (either directly from another internal extension, or directly from a DID number mapped to this extension). Calls to the extension number that have been initiated from an IVR (using the “Dial” action) or a Queue will not be forwarded.
Call Group and Pickup Group

An extension can be a member of a call group. This means other extensions that are in the corresponding pickup group can pickup calls from that extension. An extension can be in any combination of groups. Groups are managed via the Edit Call Groups link. It is not possible to remove the Default group, but it is possible to remove all the extensions from it.
Modifying an Extension
To modify an existing extension, login to your SmartPABX web interface and complete the following steps:
-
Click on the “Configure Extensions” menu option
- Click the “Edit” button next to the extension you wish to modify

-
Make the necessary changes, and when complete, click the “Update Extension 9XXX” button
-
See “Description of Extension Options” for a description of each field
- If Queues have been configured, an option will appear to add/remove this extension as a member from those queues (via a check box)
Deleting an Extension
To delete an existing extension, login to your SmartPABX web interface and complete the following steps:
-
Click on the “Configure Extensions” menu option
-
Click the “Delete” button next to the extension you wish to delete
- You will be asked if you are sure you want to delete this extension. Click “Yes”.
Checking the status of an Extension
To check the registration status of an existing extension, login to your SmartPABX web interface and complete the following steps:
-
Click on the “Configure Extensions” menu option
- Click the “Status” button next to the extension you wish to check the registration status for

If an extension is registered, the Status field will display ‘OK’, along with the IP address of the phone or router.

If an extension is not registered, then the Status field will show up an ‘UNKNOWN’

Configure Direct Indials
Direct Indial Overview
Direct Indial numbers are regular ten digit PSTN phone numbers. These numbers are the numbers that your customers use to call you from external locations. These numbers are commonly referred to as DID numbers.
Each SmartPABX is allocated with a group of Direct Indial numbers. How many you have depends on the SmartPABX package that you have purchased.
Each Direct Indial number can be configured to perform different tasks. For example if you have five Direct Indial numbers, it is possible to configure some of those numbers to be used as direct numbers for staff, some can be configured to be used for call conferencing rooms, and others can be used for IVRs, fax to email, etc.
Direct Indial numbers support multiple concurrent inbound calls regardless of whether the number is already in use. The only concurrent call limit for DID numbers is defined by the line limit associated with your SmartPABX package.
Modifying Direct Indial Configuration
To modify your Direct Indial configuration, login to your SmartPABX web interface and complete the following steps:
- Click on the “Configure Direct Indials” menu option

Figure 1.3
-
Modify the DID by changing the “Action” and “Value” to the appropriate settings, and then click on the “Save” button at the end of the line
- See Description of Direct Indial Actions for a description of each Action
Description of Direct Indial Actions
GotoExtension
The GotoExtension action will send inbound calls to this DID number directly to the extension number defined in the “Value” drop down menu box. This action should be used to assign direct numbers to staff extensions.
GotoIVR
The GotoIVR action will send inbound calls to this DID number into the IVR defined in the “Value” drop down menu box.
GotoConference
The GotoConference action will send inbound calls to this DID number into the conference room number defined in the “Value” drop down menu box.
RunSchedule
The RunSchedule action will send inbound calls to this DID number into the schedule defined in the “Value” drop down menu box. See Configuring a DID time/day schedule for more information on DID scheduling.
FaxToEmail
The FaxToEmail action will turn this DID number into an inbound fax number. Faxes sent to this DID number will be converted to a PDF file, and emailed to the email address defined in the “Value” text input box. Only one email address can be specified in the “Value” box.
DID Scheduler
DID Scheduler Overview
DID time/day schedules can be used to configure your DID numbers to perform different actions depending on what time or day the call is received (time / day conditions).
For example, a DID that is configured to run a day/time schedule could be configured to send inbound calls to an IVR called “businesshours” during the hours of 09:00 and 17:00 on weekdays, but send calls to a different IVR called “closed” during all other times or days.
To create a new DID time/day schedule, login to your SmartPABX web interface and complete the following steps:
-
Click on the “Configure Direct Indials” menu option
-
Click the “Click here to manage DID time/day scheduler” link at the bottom of the page
-
Click the “Click here to create a new DID schedule” button at the bottom of the page
-
Enter a name for the schedule and then click “Create Schedule”.
- You will be presented with a page similar to the image displayed in figure 1.4

Figure 1.4
The “Time Range” field accepts values containing time ranges in 24 hour format. For example, a valid time range is formatted like:
09:00 to 17:00
The “Day Range” field accepts values containing ranges of days from Monday to Sunday. For example, a valid day range is formatted like:
Mon to Fri
To switch to a date range rather than a day range, select the Date option from the dropdown-box. You will be presented with additional dropdown boxes to choose a starting date, an ending date, and a month the schedule is to run in. You might, for example, choose to set a schedule for between the 1st to the 7th of January. A date range must be within the same month - if you wish to have a schedule covering, say, 25th of January to the 2nd of February, you would need to create an option covering the 25th of January to the 31st of January, then a second one with the same action ranging between the 1st of February to the 2nd of February.
If you wish, you may pre-select a public holiday for a schedule. To do so, simply select the desired public holiday from the Pre-select Public Holiday field, and the date ranges will automatically be selected, with the time range being automatically set to cover the entire day. If you wish to make further modifications to the range, such as changing the date range to cover the public holiday and a day prior, you can simply change whichever fields are necessary. At present, public holidays which fall on variable dates each year (e.g. Queen's Birthday, Easter) are not options to be pre-selected.
DID schedules are ordered by priority. When a call is sent into a DID schedule, the schedule is executed from top to bottom (from the lowest priority to the highest priority). As soon as a matching time/day range is found, that priority is executed and the remainder of the schedule is not read.
DID Schedule Examples
Please see below for examples of different schedules.
Example 1

The schedule contained in Example 1 behaves as follows:
-
If the time is between 09:00 and 17:00 on a day between Monday and Friday, the call will be sent to the IVR named “openhours”
-
If the time is between 17:01 and 08:59 on a day between Monday and Friday, the call will be sent to the IVR named “closed”
- If the time is between 00:00 and 23:59 on a day between Saturday and Sundays (ie weekends), the call will be sent to the IVR named “Weekend”
Example 2

The schedule contained in Example 2 behaves as follows:
-
If the time is between 12:30 and 13:00 (i.e. lunch time) on a day between Monday and Friday, the call will be sent to voicemail mailbox 101
-
If the time is between 09:00 and 17:00 on a day between Monday and Friday, the call will be sent to the IVR named “openhours”
- If the time is between 00:00 and 23:59 on any day (Monday to Sunday), the call will be sent to the IVR named “closed”
Note that in Example 2, if an occasion arises where a call comes into this schedule and the time is between 12:30 and 13:00 on a weekday, there are 3 possible matches for this time condition.
All three priorities in this schedule (1, 2, and 3) are a match. Because schedules are executed in order of priority from lowest to highest (1 to 3), the first match in this schedule would be priority 1, which would send the call to voicemail mailbox 101.
Configure Conferences
Conference Overview
Often the need arises for several people to be involved in a telephone conference from different locations.
Using Conference Rooms makes it possible for multiple callers to dial into a conference room and all conference together.
Conference rooms are protected by a pin number. When callers first dial a conference room number, they are required to enter the pin number for that conference room on their telephone keypad before being granted access.
Conference Room numbers are allocated automatically. They are 3 digit numbers ranging from 901 to 999.
It is possible to dial a conference room directly using its conference room number (eg 901) from any SIP phone connected to your SmartPABX.
It is also possible to configure one or more of your direct indial (DID) numbers to route to a conference room (see Configure Direct Indials). This allows callers outside of your PABX to gain access to your internal conference room.
Creating a Conference Room
To create a new Conference Room, login to your SmartPABX web interface and complete the following steps:
-
Click on the “Configure Conferences” menu option
-
At the bottom of that page, click on the “Create a new conference room” button
-
You will be presented with a page similar to the image displayed below
- The pin number will be generated automatically, but can be changed if required

Deleting a Conference Room
To delete a Conference Room, login to your SmartPABX web interface and complete the following steps:
-
Click on the “Configure Conferences” menu option
- Click the “Delete” button next to the conference room you wish to delete
Configure Ring Groups
Ring Group Overview
A ring group can be used to define a list of members (either SIP extension numbers, or PSTN phone numbers) that can then be used by other applications within the SmartPABX to dial all of those numbers at once (in a ring-all type fashion, where the first person to answer receives the call).
A ring group is useful when one person could be at two or more different locations, and they need to be able to answer their calls from any of those locations.
By creating a ring group and defining the extension numbers (or PSTN numbers) of those locations as members of the ring group, when a call rings this ring group all phones in the ring group will ring, and the person can answer the call on any of those ringing phones. Once the call is answered from one of the ringing phones, all other phones immediately stop ringing.
This functionality is sometimes referred to as single number reach.
Ring groups can dialled in the following scenarios:
-
A ring group can be dialled from within an IVR using the “Dial” action. See “Configure IVRs” for more details.
- A ring group can be dialled when an extension has the “Send inbound to Ring Group” option enabled. See “Configure Extensions for more details.
Ring groups cannot be dialled in the following scenarios:
-
A ring group cannot be dialled from within a Queue
- A ring group cannot be set as an action for a Direct Indial number.
For a Direct Indial number to be configured to dial a ring group, the Direct Indial number must either:
-
be configured to first route through an IVR (using GotIVR), and that IVR should dial the ring group (using the “Dial” action)
- be configured to first route to an extension (using GotoExtension) which has the “Send inbound to Ring Group” option enabled.
Creating a new Ring Group
To create a new Ring Group, login to your SmartPABX web interface and complete the following steps:
-
Click on the “Configure Ring Groups” menu option
-
At the bottom of that page, click on the “Click here to add a new Ring Group” button
- Enter a name for your Ring Group, and then click “Create Ring Grop”
Modifying Ring Group Members
To add or remove members to a Ring Group, login to your SmartPABX web interface and complete the following steps:
-
Click on the “Configure Ring Groups” menu option
-
Click on the “Edit” button next to the Ring Group you wish to modify
- A page similar to the image below will be displayed

-
Members can either be 4 digit extension numbers, or can also be 10 digit PSTN numbers
- Once you have finished defining your Ring Group Members, click the “Update Ring Group” button
Deleting a Ring Group
To delete a Ring Group login to your SmartPABX web interface and complete the following steps:
-
Click on the “Configure Ring Groups” menu option
-
Click the “Delete” button next to the Ring Group room you wish to delete
- You will be asked if you are sure you wish to delete that Ring Group. Click “Yes”.
Configure IVRs
IVR Overview
An IVR (Interactive Voice Response) is a PABX application that communicates with a caller through configurable voice driven menus. Callers can be played different announcements (using WAV audio files), and can optionally be presented with different menu options, where the IVR can be programmed to perform different actions depending on the callers menu response (via keypad DTMF input).
IVRs can be very complex, or very simple. Some IVRs may contain hundreds of lines of priorities while others may only contain one or two that perform basic call routing tasks.
An IVR is programmed on a line by line basis from top to bottom. Each line (from top to bottom) is executed by order of priority, from lowest to highest. When a call is routed to an IVR, the first priority that will be executed is priority 1, and then 2, and 3, and so on.
Please see below for an example of a simple IVR that answers the call, plays a sound (WAV) file to the caller, and then sends the call to voicemail box 101 and finally hangs up.

As demonstrated in the example above, each line (priority) of the IVR above contains an “action” and a “value”. Those actions and values can be changed to accommodate your requirements. In this particular example IVR there are no menu options defined, however that will be covered further in this section.
Description of IVR Actions
Answer
The Answer action will cause the PABX to pick up (answer) the call. This option should present in every IVR where sounds are to be played to the caller.
It is not necessary (nor possible) to set any value for the Answer action.
At completion of this action, control will be passed to the next highest priority in the IVR.
Ringing
The Ringing action will generating “ringing” tone to the caller. The Ringing action should always be immediately followed by the Wait action the time defined in the following Wait action will determine the length of time that “ringing” tone is generated for.
It is not necessary (nor possible) to set any value for the Answer action.
The Ringing action does not listen for DTMF input from the caller.
At completion of this action, control will be passed to the next highest priority in the IVR.
Play
The Play action will play the selected WAV audio file to the caller.
The Play action will also listen for DTMF input from the caller, and will execute the number option pressed by the caller if the IVR number option feature has been programmed.
At completion of this action, control will be passed to the next highest priority in the IVR.
Wait
The Wait action caused the IVR to pause for the number of seconds defined in the value field.
The value field accepts numeric characters containing the number of seconds to wait for. It also accepts values expressed as either whole numbers or fractions of seconds (eg 0.3 would cause the IVR to wait for 300 milliseconds, or 1.8 would cause the IVR to wait for 1.8 seconds)
At completion of this action, control will be passed to the next highest priority in the IVR.
WaitExten
The WaitExten action behaves the same as the Wait action, the only difference is that the WaitExten action will also listen for DTMF input from the caller, and will execute the number option pressed by the caller if the IVR number option feature has been programmed.
At completion of this action, control will be passed to the next highest priority in the IVR (i.e. the next line).
Dial
The Dial action can dial either a:
-
4 digit extension number
-
10 digit PSTN number
- Ring Group
The value field should contain either the number to dial, or the name of the Ring Group.
The number to dial can also optionally be followed by a comma, and then the amount of seconds to dial for. If this option is not present, the Dial command will dial for 30 seconds before return control to the next priority of the IVR.
Please be aware that when a called party answers a call initiated using the Dial action, the IVR loses control of the call. The call will never be returned to the next priority of the IVR, because when the call is finished the called party will hang up, effectively terminating the call.
Only when a call initiated using the Dial action goes unanswered will control be passed back to the next priority of the IVR.
Dial Example 1:
9001,25
The dial value above would dial extension 9001 for 25 seconds, and then if unanswered would return control to the next priority of the IVR.
Dial Example 2:
MyRinggroup,10
The dial value above would dial all members of the Ring Group named MyRinggroup 10 seconds, and then if unanswered would return control to the next priority of the IVR.
Dial Example 3:
0394949494,20
The dial value above would dial the 0394949494 PSTN number for 20 seconds, and then if unanswered would return control to the next priority of the IVR.
Dial Example 4:
9008
The dial value above wold dial extension 9008 for 30 seconds, and then if unanswered would return control to the next priority of the IVR. The Dial command would use 30 seconds as the default length to dial in this case, because the length was not specified.
Dial Example 5:
MyRinggroup
The dial value above wold dial all members of the Ring Group named MyRinggroup for 30 seconds, and then if unanswered would return control to the next priority of the IVR. The Dial command would use 30 seconds as the default length to dial in this case, because the length was not specified.
GotoVoicemail
The GotoVoicemail action will send the call to the mailbox number specified in the Value drop down menu box.
It is important to note that when sending a call to a Voicemail box using the GotoVoicemail action from an IVR, the busy/unavailable greeting for that mailbox is not played. The call is instantly transferred to the point at which the caller hears a beep to being recording their message.
Therefore if you wish for a greeting to be played to the caller before them leaving a message, you should make the priority before the GotoVoicemail action a Play action, and it should Play a WAV file greeting to the caller before it is sent to voicemail.
After the caller has been sent to voicemail,, control is not passed back to the IVR (as the call is terminated by the caller hanging up).
GotoDirectory
Send caller to the Corporate Directory
GotoIVR
The GotoIVR action is used to send a caller to another IVR.
Select the name of the IVR to send the caller to from the drop down menu box
At completion of this action, control will be passed to the new IVR.
GotoQueue
The GotoQueue action is used to send a caller into a Queue
Simply select the name of the Queue to send the caller to from the drop down menu box
At completion of this action, control will be passed to the next priority in the IVR
Please note that the length of time that the caller will remain in the queue before control is passed back to the next priority of the IVR is defined within the Queue Configuration for that Queue (see “Maximum Join Time”). When the “Maximum Join Time” is reached, control will be passed back to the next priority in the initiating IVR.
Hangup
The Hangup action is used to hang up (terminate) the call.
The Hangup action should be used as the last line in all IVRs.
Read Text
The Read Text action will read out the text in the box to the listener. Note that errors can occur if punctuation is used here.
Date Redirect
This option will redirect to a selected IVR if this option is reached within a certain specified date range. This option will take into account all times of day during the selected dates. For example, if the dates chosen are 1 to 10 and the month chosen is August, then if this option is reached at any time during the 1st to 10th of August, the person calling will be directed to the IVR selected.
If either date or the month are set to N/A, then this redirect will apply to all dates or months, depending upon the option. For example, if the date is set from 1 to 2 and the month is set to N/A, then in the first or second day of any month the person calling will be directed to the IVR selected.
Day Redirect
This option will redirect to a selected IVR if this option is reached within a specific time range on a certain day. If this option is reached within the specified time range and on the day or day range selected, the person calling will be directed to the selected IVR. For example, if the time is set to 9:00 to 17:00 and the day redirect selected is Monday to Friday, then someone reaching this option between 9 AM to 5 PM on a Monday to Friday will be redirected to the IVR selected.
Caller ID Redirect
This option will redirect the caller to a specified IVR if the caller ID matches the first few digits you have specified. For example, if you have entered 03 into the field, then a caller whose number begins with 03 will be redirected to the specified IVR upon reaching this option. You may specify as many numerals as you wish into this field.
Set Music on Hold Group
This will allow you to set up a music on hold group for the duration of this call. Whatever music on hold group you set here will be played if the user on the other end of the phone is put on hold.
Adding number options to an IVR
Some IVRs may include the ability for callers to press keypad digits to navigate through the IVR.
For example, a company with three different departments may want to play a sound file in their IVR that instructs their callers to press 1 for Sales, 2 for Accounts, and 3 for Support.
At any point in your IVR where a WaitExten or Play action is underway, the system will be listening for DTMF input from the caller.
When any digit is pressed, the IVR then performs whatever task it is programmed to for that option number. So for example in the case where a caller presses 1 for Sales, the IVR can be programmed to, for example, send the call into the Sales Queue. And if the caller presses 2 for Accounts, the IVR can be programmed to, for example, send the call into the Accounts queue.
Adding number options to your IVR is a simple procedure.
At the bottom of every IVR, the feature is present. Under the “Editing IVR number options” heading, simply select the number of the option you wish to add (for example “1”, for sales), and then click Go.
A new option number will be created. Just like with IVRs themselves, option numbers can have different priorities that are executed in order from lowest to highest.
Below is an example of the “Number Options” of an IVR that is configured with three different number options (1, 2 & 3), each of which are performing a different action with multiple priorities:

In the above example, if the caller presses 1 the PABX will firstly play the sound file named “welcome-sales.wav” to the caller, and will then send the caller into the IVR named Sales.
If the caller presses 2 the PABX will firstly play the sound file named “welcome-accounts.wav” to the caller, and will then send the caller into the IVR named Accounts.
If the caller presses 3 the PABX will firstly play the sound file named “welcome-support.wav” to the caller, and will then send the caller into the IVR named Support.
Configure Queues
Queue Overview
A Queue can be used to ‘queue’ your inbound calls, playing hold music to the caller until someone is available to take the call. Each caller into the queue maintains there position in the queue, and the calls are delivered to “members” in the order in which they came into the queue.
A queue can also be configured to play sound file announcements periodically while the caller waits, and can also be configured to announce the position of the call in the queue to the caller periodically.
A queue must contain ‘members’, which is the term used to describe a telephone/extension that is logged into a queue, ready to answer calls. Up to 20 members can be logged into any queue.
Members can be either 4 digit extension numbers (eg. 9002) or can also be 10 digit PSTN numbers (eg 0399999999).
There is no limit on how many inbound calls can be waiting in a queue at any one time. The only limits are defined by the number of lines your SmartPABX supports.
All calls that are being sent into a queue must first be routed through an IVR, and that IVR should use the “GotoQueue” action to send the call to the queue.
Creating a New Queue
To create a new queue, login to your SmartPABX web interface and complete the following steps:
- Click on the “Queues” menu option
- At the bottom of that page, click on the “Click here to add a new extension” button
- You will be presented with a page similar to the following
Description of Queue Options
Select a ring strategy for this queue
The ring strategy field defines the way in which the PABX delivers calls to queue members.
-
ringall: ring all available members until one answers (default)
-
rrmemory: round robin with memory, remember where we left off last ring pass
-
leastrecent: ring member which was least recently called by this queue
-
fewestcalls: ring member with fewest completed calls from this queue
- random: ring random member
Select maximum join time
The maximum join time field defines the maximum length of time in minutes that a caller can be waiting in a queue before being dropped from the queue and sent to the next priority of the IVR which sent the call to this queue.
Select ring cycle length for this queue
The ring cycle length field determines the length of time in seconds that the PABX will attempt to ring queue members for. The PABX will then wait for the length of time defined in “wrap-up time” before trying the ring cycle again. This continues until the call is answered, or the maximum join time is reached.
Select wrap-up time for this queue
The wrap-up time field describes the length of time the PABX waits after an agent completes a call before sending another call to that member.
Select the frequency of queue position announcement
The frequency of queue position announcement field defines the intervals in seconds at which the caller’s position in the queue is announced to them.
If this option is enabled, at the defined intervals the PABX will play an announcement to the caller, informing them of their position in the queue.
Select an announcement to play periodically
Select an announcement (WAV sound file) that will be played to the caller every X seconds (seconds defined in the frequency field below)
Announce queue name on answer
This options relates mainly to members of a queue and is helpful when a single person must monitor multiple queues. Turning this setting on will have the PABX read out the name of the queue to the member answering the call. No recording is required, as the audio is taken from the name of the queue itself.
Can callers join this queue if no members are log in
This field describes whether or not a caller will be able to join a queue if there are no members logged into that queue. If this option is set to No, the call will be dropped from the queue and sent to the next priority of the IVR which sent the call to this queue.
Ring agents who are already on the phone
This field defines whether the PABX will send further calls to members who are already on phone calls. If set to Yes, this option would only work if the member has call waiting activated on their telephone.
SLA Target for this queue
This field is used for statistics only.
Digit input from caller
If a caller presses any digit on their telephone keypad while waiting in the queue, commands can be configured to run when that digit is pressed.
Music On Hold Group for this queue
The music on hold group selected here will be played to users whilst they are in this queue prior to speaking to someone in the queue.
Deleting a Queue
To delete a queue, login to your SmartPABX web interface and complete the following steps:
-
Click on the “Configure Queues” menu option
-
Click the “Delete” button next to the queue you wish to delete
- You will be asked if you are sure you want to delete this extension. Click “Yes”.
Extension Console
Extension Console Overview
The Extension Console page shows the current status of every extension on the PABX. The page is update live in real time.
-
idle – Extension is not on a call
-
in use – Extension is on a call
- ringing – There is a call currently ringing on this extension

Note: If an extension is on a call, and also has another inbound call ringing on their phone, the status will show as “in use” rather than “ringing’.
If your extensions are associated with groups, you can filter the extensions shown by group if you desire. Simply tick or untick the boxes corresponding to each group below the extension statuses. By default, all extensions in groups will be shown on going to the Extension Console. If you wish to see the status of an extension which is not in a group, either add it to a group, or tick the Show All Extensions box. You can add or change the group an extension is in by editing it.
Call Records & Recording
Call Records and Recording Overview
The Call Records and Recordings section of the SmartPABX allows the administrator to view the records of all calls processed by the SmartPABX.
If call recording was enabled for any particular call, it is also possible for the administrator to download the WAV file recording of the call, using the “Listen” link at the end of the record.
To search for a particular call of group of calls, you may search based on any combination of the following criteria:
From Date – to search a particular day range, set From Date to the start date of the range
To Date – to search a particular day range, set To Date to the end date of the range
Account Code – search for calls that are either equal to or containing a particular Account Code value
Caller ID – search for calls containing a particular Caller ID value
Destination – search for calls containing a particular Destination value
Duration – search for calls that are either equal to, greater than or less than a particular duration (seconds)

You may navigate the call records using these filters and the page numbers at the bottom of the page. These numbers also include links to the first and last pages of the search when available.
System Sounds
System Sounds Overview
System Sounds are used by IVRs and Queues to play pre-recorded announcements to callers.
All system sounds are stored as WAV files. Prior to uploading any WAV files to the SmartPABX you should ensure that your WAV files are saved as Windows PCM 16-bit 8000hz Mono files. WAV files of any other type may not play correctly.
Upload a new WAV sound file
To upload a new WAV sound file to your SmartPABX, login to your SmartPABX web interface and complete the following steps:
-
Click on the “System Sounds” menu option
-
At the top of that page, click on the “Browse” button
-
Select the WAV file on your computer
- Click on the “Upload” button

Alternatively, you can make system sounds yourself by dialling the number 25 into your handset, and then following the instructions that follow. After you have finished making this recording, it will appear in the list of system sounds with the name custom_recordingX.wav, with X being incremented as each custom recording is made.
If you wish to rename any of your system sounds, simply press the Rename button for that sound, and type in the new name you wish. Some characters may be replaced, and if you attempt to rename a sound to one which already exists, you will be unable to.
Music On Hold
Music On Hold Overview
Music on hold files are used when a call is put on hold or parked. Whilst there are default sounds which come with your SmartPABX, like with the systems sounds you may upload your own custom recordings.
System sounds may be stored as either an MP3 or a WAV file but it is highly recommended that you use a similar quality and length of sound files as you would with your system sounds. All Music On Hold sounds are saved on your SmartPABX system.
Music On Hold can also group files together. This is useful for if you need to use specific sound files for different queues, or if you wish to set a specific music on hold group as the wait music for an IVR. In order to add a new group, press the Add Group button and choose a name for the new group. Within this new group, which you can navigate to by selecting that group from the drop-down menu of groups, you can upload sounds, or edit and delete them as with the default group. If you wish to delete a music on hold group, simply press the Delete button whilst on the page for that group.
Upload a new Music On Hold sound file
To upload a new file for Music On Hold to your SmartPABX, login to your SmartPABX web interface and complete the following steps:
-
Click on the “Music On Hold” menu option
-
At the top of that page, click on the “Browse” button
-
Select the MP3/WAV file on your computer
- Click on the “Upload” button

If the upload has completed, your new sound should show in the “Current On Hold Sounds” table. Note that if it isn’t in the table or there are no details for the sound (type, sample rate, channels, bits and/or duration are blank) the file itself was either too large in size or invalid. If this is the case, the sound will most likely result in silence during call holding.
As with system sounds, the same playback, deletion and renaming functionality is present and these changes will be fully applied once you click the “Apply Changes” button.
By default, on hold sounds will play in a random order. If you wish to have this changed, please contact support.
Miscellaneous Mailboxes
Miscellaneous Mailboxes Overview
Miscellaneous voicemail mailboxes are used when voicemail is required but it is not suitable to use a staff members personal voicemail box attached to their extension. For example. In the case where you want your customers calling your main number to be able to leave a voicemail message for you if you are closed, you may need a voicemail box which plays a generic voicemail greeting to the caller informing that that you are currently closed, rather than a personal staff members voicemail greeting. It is cases like this that you would use a miscellaneous voicemail box.
Mailbox numbers for miscellaneous voicemail boxes are allocated automatically from 101-199.
Miscellaneous voicemail boxes operate just like a standard voicemail box attached to an extension number. You can check your voicemail by dialling *1 from your handset and logging in with your mailbox number and pin, and you can also configure the SmartPABX to email voicemail messages as WAV files to an email address.

Queue Stats
Queue Statistics Overview
Queue Statistic is a useful tool that provides an overview on inbound
calls to queues.

You can also view the stats for a queue on a past date by selecting a date from the input box in the top-right hand corner of the page. Once you have selected a date, it will show the statistics for that queue as it was by the end of that day.
Call Parking
Call Parking Overview
Call Parking is used to disconnect a caller from your handset and place them on hold. Any extension is then able to pickup the on-hold call. If the caller is left on hold for longer than a pre-defined time it will return the caller to the original extension that placed it on hold.
Call Parking Settings

The parking extension is not editable, but it displayed on this screen.
Parking positions is the number of parking lots that are available. These are numbered from 1 after the parking extension displayed above. In this example screenshot the parking extensions will be 701,702,703,704,705
Parking time is the timeout before the parked call is returned back to the original extension.
Using Call Parking from a Handset
To place a caller into a Parking lot, you need to transfer the call to the Parking Extension.
If you transfer the caller to the first number (700), it will assign the next available parking lot (starting with 701) to the caller. The PABX will read the extension of the parking lot that it is placing the caller into.
To retrieve the call, dial the parking position from any handset, for the first caller, this will be 701.
You can also transfer a caller directly to any parking position by transferring them directly to that parking position. For instance the last parking lot is 705. If you transfer the caller to 705, you can then retrieve the caller using 705. Please note that if a parking lot is already in use for anouther caller, you will instead join those two external callers together. It is recommended to use this only with an assigned phone key where you can see the status of the line at any time before connecting the external caller.
The setup a monitor/BLF button for parking lots, this can be configured on the call parking extension (701 onwards) as per extension BLF settings for your handset.
The provisioning tool for handsets built into the PABX system supports parking on Cisco SPA525G2 and Cisco SPA504 handsets with or without extension consoles.
Listen/Monitor
Configuration
Define groups of phones that can be listened in on by supervisors. Optionally supervisors can ‘whisper’ to the extension but remain silent to the external caller.
The feature can be found under ‘Listen Groups’

Add a new listen group:

The first step is to give the group a name. The name is purely descriptive.

The extension for monitoring is auto assigned, starting at 555. Click edit to start configuring the group.

Supervisor extensions:
A list of extensions that are allowed to access the listen feature. Any attempts to call the listen number that are not on the supervisor list will play a busy beep and hang up.
Whisper enabled:
With this feature enabled, the supervisor is able to be heard by the person being monitored, but not the external caller.
Quiet enabled:
With this enabled, the announcement of the channel you are listening to is suppressed. This allows quicker shifting between calls. With it disabled the channel extension will be announced to the supervisor when first entering or changing the channel.
Members:
A list of extensions to be monitored by this group.
Both the supervisor and members list are 1 extension per line.
The supervisor and members list must contain at least 1 extension each before the listen feature will be active and available.
When completed click update listen group.
Usage
To listen to in place calls, from a defined supervisor phone dial the extension assigned to the listen group (the first will be 555, the second 556 etc)
If there is a call in place, at beep will play then the extension number.
To move between extensions press *
To listen to a particular extension dial the extension number then #
Press # to change the volume level (-4 to +4)
When no calls are in place, the line will be silent. As soon as a call is placed the monitor will announce the extension and start listening in.
Reporting
Introduction
The reporting feature in the SmartPABX allows managers to quickly get an overview of agents activity from a live report.
Creating a report group

Each manager ‘login’ contains a set of extension numbers. This group of extensions is used to generate all reports for that manager login. Extensions can appear in multiple groups.
Login as the administrator on the SarmtPABX. Access the report section and click ‘Add a new Report Group’
-
Give this group a name. This is the username for the manager.
-
Click edit on the new group.
-
Description: This text will appear at the top of the reports
-
Username: This is the username a manager will login with.
-
Password: This is the password for the username the manager will login with
-
Day KPI (mins): In the bar graph of minutes over period for each extension, this Day KPI will be used in the day report as the Target red line.
-
Week KPI (mins): As per day but for the week report
-
Associated Queues for members: For the statistics report the login/logout times are calculated from an agent logging in and out of the associated queues. Please see ‘Queue settings for reports’
- Members: List of extensions associated with this group.
Queue settings for reports
Agents can login and logout via queues. The ‘statistics’ report and ‘agent logs’ display this information to the manager.
An extension user can login / logout to the queue by logging into the SmartPABX using their extension number and ‘webpassword’ (see Agent logins)
To allow a user to login / logout from the queue using only their phone, you can define a * code using the Agent login code / Agent logout code

The members list on the queues page overrides the agent logout. If an extension is defined here it will always receive calls to this queue. The report for agent login / logout will still work.
Agent logins
Administration
Each agent is able to login / logout, and have this information available in the manager report using either a * code (see Queue settings for reports) or by logging into the web interface with the extensions users login details.
The admin can define an extensions login details on the configure extensions page.

Extension number: Is the username for the agent login.
Web user password: Is the password for the agent login.
Extension Comment: This field is used in the reports to display a text field associated with the extension. This could be a persons name or position.
Agent / Extension login
An agent can login to update their settings and login/logout to the system by using their extension number and their assigned web password.
Once logged in an agent can login/logout using the Queue Membership: field and the associated queue login/logout button.


Reports
The reports can be viewed by either logging into SmartPABX with the defined report username/password or via the administration console on the report groups page by clicking ‘view’
Extension status

Call time (mins): Total time recorded against this extensions
Call count: Total number of calls this extension has been involved with
Avg time / call (mins) : Total Call time / Total Call count
Status: Display the queues this agent is currently logged IN/OUT of.
Since change (mins): Time since the status was last changed. In this example the 9200 agent has been logged in for 15 mins.
Total active time today (mins): Total time logged into the queue, including any previous sessions already logged out today.
Active call: The agent is currently on an active call. This has not been included in the Call time column yet.
Minutes SLA

Time on calls for each extension graphed against a ‘Target’ KPI.
The settings for the graph allow viewing previous data.

The dates, Day or Week periods are selectable, and if the call time includes incoming / outgoing or combined data.
The monitor and auto refresh displayed the report without the interface and auto refreshes periodically.
Minutes compare

This graph displays each extensions total call time for the period selected and compares to all over extensions.
Queue stats
Displays incoming call status for each Queue.

Agent logs

Report on completed sessions for each agent.
Date and member extension is selectable.
Monitor and Refresh
Enable this option to display the report without banners and an automatic refresh. The URL contains a auth code that allows the report to be viewed with logging in by using the complete URL on another browser.
Call records
View the call records for the users in this report group. An export option is available that will download the call records in CSV format suitable for loading and process in Excel.
Queue Data
You can view data for a queue by clicking on either the Queue Stats, Historical Queue Data, or Ranged Queue Data buttons. Each will give a different set of information.
- Queue stats: View the queue stats for each queue at different days in the past. You can change the day you are viewing the statistics for by clicking on the box in the top-right hand corner of the page and selecting a date from the drop-down box. If there is no saved data for that day you will be informed that there are no configured queues for that day.
- Historical Queue Data: To compare stats between different queues on different days, you can choose the type of data you wish to view by selecting it from the drop-down box in the top right-hand corner. This will create a bar graph showing the values for each queue. If you wish to change the day you are viewing data for, select a date from the box that appears when you click in the Select Date box.
- Ranged Queue Data: In order to view queue stats over a period of time, you can select to view the time range as either a week or a month from the drop-down box at the bottom of the page. You can then choose the period by clicking in the box in the left, which will let you select the date or dates you wish to view data for. Finally, you can select the type of data for those queues by selecting it from the second drop-down list. Once you have selected all of the options for viewing data, press the Refresh button to view the data in a line graph.
Backing Up and Restoring PABX Configuration
Overview
In some cases it may be necessary to move the setup of one SmartPABXTM system to another, or there may be in instance where you need to revert the configuration back to a previous state on the same system. Using the backup and restore tool, you can download a configuration file for a SmartPABXTM which may be used to restore this configuration on the same or different system.
Backup Process
Clicking on the “Backup & Restore” link in the navigation menu will takeClicking on the “Backup & Restore” link in the navigation menu will take you to the relevant interface, the backup menu on the left of the screen and the restore menu on the right. Looking at the Backup side, the most notable feature is the checkbox list.

These options are known as “Config Groups” and they are the settings which you wish to backup. All data from the selected Config Group is saved to the backup file, this means that when restoring only the groups which were selected will be affected.
If you are unsure as to which groups you want or are interested in a full system backup, checking the “Select All” box will configure a full backup of the PABX configurations. This option is also very useful if you want a majority of the settings excluding a few, allowing you to uncheck the groups you do not wish to back up afterwards. Basically the backup will only note boxes which have been ticked and so it is up to you to decide which groups you want to save.
After you have decided which groups you want, you may set a filename for the backup. This is completely optional, by default, the file is named using the convention “[pabxname_dd-mm-yy].bbsconf”. You can rename the file itself and this will not affect the settings kept in it.
Clicking the “Generate Config File” button will begin the backup process. This may take a moment, but after the backup has completed you will see a link to download the backup file itself.

This file contains all the settings you selected to save from your SmartPABXTM system and is required for the restore process. Do not attempt to modify the contents of the file, as this will result in the backup failing.
Restoring From Backup
As for the restoration, assuming you have the file saved from the backup, it is a relatively simple process which just requires you re-upload the backup file to the SmartPABXTM.
If you have renamed the file and you are unsure that it is a valid backup file, look at its file extension.

A valid backup file ends in .bbsconf which is a special kind of file only usable with the SmartPABXTM. This ensures your system’s configuration is kept safe, the data in the file encrypted.
Returning to the same “Backup/Restore” page as before, you’ll see on the right side of the page we see the “Restore PABX Configuration” form.

Clicking on the upload field, select the .bbsconf file you wished to restore to. Note that the SmartPABXTM Restorer will work with any .bbsconf file, no matter when the backup was made or what groups it had selected.
Press “Restore From Backup” after uploading the file, and this will run the restore process. Like the backup, this may take a moment but you’ll know it’s complete when you see the “Restore Complete” prompt on the next page.
After applied, the PABX system will be exactly as it was when the backup was taken. Note that the system does wipe the selected database tables before restoring so ensure you have backed up all necessary settings and data from your SmartPABXTM.
Access Control
 The administrator can set access levels for user logins via this
interface.
The administrator can set access levels for user logins via this
interface.
A value of 1 means the option is enabled for all users, 0 is disabled for all users.
To give only certain users access please enter a comma separated list of extensions that are allowed access.
MYOB Integration
Introduction
This section will detail how to use your PABX to automatically record incoming call details from clients and generate invoices for those clients using MYOB. In order to use this feature, you will need an a login for your MYOB account and a login for the company file(s) you wish to use.
Setting Up
Start by clicking on the MYOB Features button of your SmartPABX. After reading through the information on the screen, you will be taken to a secure MYOB login page. After putting in your MYOB email and password successfully, MYOB will authenticate your details, then redirect you to a new page.

The first thing you will need to do is set a company file on the MYOB Settings page. You will be unable to access any other features of MYOB until you do this. Upon navigating to the MYOB Settings page, input the username and password for the company file you wish to access, then select that company file. You can now access any part of the MYOB section of your PABX.
To navigate the MYOB features, simply press on any of the buttons in the above screenshot. If you wish to return to the main menu, simply press the Return to admin console text.
MYOB Features
Configure Time Billing
To configure your time billing activities, which are necessary for charging clients, press the Configure Time Billing button or navigate using the menu. This will take you to a form for creating a time billing activity, as well as presenting a list of any time billing activities that already exist.

To create a new time billing activity, simply fill in all of the appropriate fields and press Create Billing Activity. When creating this activity, it is assumed that the type of billing will be hourly. If your company charges by a different time value, please convert that value into the rate per hour before submitting the form. This form also assumes that the activity is using an activity rate for the calculation of the rate. Due to certain restrictions by MYOB, only certain income accounts and tax codes can be applied to time billing activities, and so the menus will only display those that are applicable.
If you wish to edit an activity, press the Edit button next to the one you wish to edit in the list. This will take you to a similar form to creating a new time billing activity. Simply edit the fields you wish and press the submit button.
If you wish to delete an activity, press the Delete button next to the one you wish to delete in the list of activities. Simply press the Yes button that comes up to delete the selected activity. Due to restrictions from MYOB, an activity cannot be deleted if it has previously been used for an invoice.
Overdue Customers
The overdue customers setting allows you to set up reminder calls for customers who have an overdue invoice which needs to be paid. Navigating to this section will bring you to a list of all customers who currently have an overdue invoice.

By default, customers are set not to receive reminder calls when they are overdue on an invoice; the calls need to be set up manually. For each customer, there are several options available to set.
-
Number to Call: This is a drop-down menu with a list of phone numbers for that customer from your MYOB file, which can be used to set which number will be dialled for the automatic reminder. If the customer has no numbers in your MYOB file you will need to update it with at least one before you can set up a reminder call for them.
-
Frequency: The frequency of how often the customer will be called – daily, weekly, monthly, a set interval of days, or never. By default this is set to never. If set to interval, the first call made will occur from however many days you set from the present day.
-
Time to Call: The time of day, in twenty-four hour time, which the customer will be called at. By default this is set to 9 AM. Due to the number of calls a line can support, depending upon the number of customers who have to be called at the same time, they may not all be called at precisely the time set.
-
On: Which day the customer will be called on. For frequencies of weekly and monthly, the day of week and date respectively will need to be selected from the drop-down menu. For an interval period, the number of days as a whole numeric number will need to be put into the box. This can be left blank for frequencies of never and daily.
- Call on Weekends: Whether or not weekends should be ignored. Ticking this means that calls will go through on Saturdays and Sundays.
After your desired options have been set, you can press Submit to set up the automated call for that customer. Every time the appropriate time is met, the customer will receive a call reminding them of their overdue invoice. You can set the details of what the call will say with an IVR (see Call Settings).
Once a customer no longer has an overdue invoice, automated calls for them will stop occurring, but if you wish to stop recurring calls for them prior to them paying their overdue bills, simply set the frequency of calls for that user to never.
If you wish to apply the same overdue call setting to all customers at the same time, there is a section at the bottom of the screen for doing so. Note that if this is used, the first number set for each number will be used as the number to call, so if you need the call to go to a different number, you will have to set it manually.
Call Settings

The Call Settings page allows you to set certain miscellaneous features.
-
Incoming Call Settings: This will allow you to set whether or not a client will be automatically added to your MYOB file when they dial in if they are not already in it. Note that clients will be added with the bare minimum of information, as there is no way to establish information about a client using just their phone number. If this is selected, there is also no way to distinguish between clients and non-clients calling an extension.
-
Overdue Call Settings: This will allow you to set what happens when a customer receives an automated call reminding them of their overdue bills. The default option will call the client play a message explaining what the call is, and then read through the details of each of their overdue bills. It is recommended that you set overdue calls to go to an IVR.
- Pay by Phone: This will allow you to choose the account payments go to for phone payments using Secure Pay. This is compulsory for using Secure Pay as a feature.
Charging Clients
Client List
Billing clients for their calls can only be done whilst logged into SmartPABX on an extension. In order to find unbilled clients, click on the Time Billing section of the navigation bar. This will present you with a list of clients who haven’t been billed for their calls.

If the same time billing activity can be used for all unbilled calls, select it from the drop-down list at the bottom of the page and press Generate Invoice. This will generate an invoice for each unbilled call for each client, and put it those invoices through to the MYOB file.
If each client needs to be billed separately due to different calling rates, click on their name or the company name to be taken to a separate page for the billing.
Billing Individually

Upon clicking on a client’s name and being taken to a new page, you will be given a list of their unbilled calls, with the date it occurred and how many they minutes the call lasted being displayed. In order to charge for a specific call, select an activity from the drop-down box, wait for the amount to be calculated, and then press the Generate Invoice button. The rate, amount, and tax code are all calculated automatically by the SmartPABX and cannot be manually changed.
If there is a specific call which doesn’t need to be charged for, press the Ignore button adjacent to that call.
If all unbilled calls can have the same activity applied to them for this client, simply select an activity from the drop-down list at the bottom, and press Generate Invoice.
After the necessary invoices have been generated, it is assumed that someone working with MYOB will fill out any additional details before sending the invoice to the client.
Client Account IVRs
Integration
As another MYOB feature for your SmartPABX, you have the option of setting up IVRs to allow customers to check details of their account. If you need assistance setting up IVRs, see Configure IVR, as this section focuses solely on the MYOB integration.
When adding an IVR, if you have MYOB enabled as a feature on your SmartPABX, you will see several additional options in an IVR action list.

MYOB Customer Account will, when reached on the IVR list, read the caller’s phone number, look them up in the database to see whether or not they exist, and if they do, find their MYOB account details, then read out the total amount of money they currently have to pay to the user.
When MYOB Customer Details is reached on the IVR list, it will look up the caller’s phone number in the database, and if they exist, it will go through all of their unpaid invoices. For each one, it will read aloud the amount they owe for that invoice and say when it must be paid by.
MYOB Overdue Invoices will look up all of the overdue invoices the caller has, and read out their details one-by-one.
Take Credit Card payment will allow callers to input a credit card and the details associated with it to the phone, which after being confirmed by Secure Pay, will make a payment and mark that invoice as being paid. Making a payment by credit card will automatically use the oldest invoice for that client for payment.
Note that if a caller is dialling from a phone which has not been billed or is not in the database, then the system will be unable to find them. They need to call from the same phone as they previously have.
An IVR showing an example of how to allow customers to access each feature by pressing different buttons on their phone is shown below.

Pay by Phone
MYOB users are able to pay their oldest overdue invoice via a phone call. With this feature you can setup a DID to go to an IVR that holds the “Take Credit Card Payment” option. The below instructions will guide you on how to achieve this.
Setup
Firstly, you must have a Secure Pay account to utilize this feature. If you do not have a Secure Pay account, you may register one at https://www.securepay.com.au/.
Once you have setup your Secure Pay account, you can enter your Secure Pay Merchant ID and Password into the Phone Payment Setup page.

Secondly, you must select a MYOB account for payments to go to. To do this, navigate to MYOB Features from the dashboard and then to Call Settings.

Here you will be presented with a section called “Pay by Phone”. Underneath this you will see a dropdown menu to select one of your MYOB accounts. Whichever account that is selected here will be where phone payments will be made.

Xero Integration
Introduction
Compatibility with the Xero accounting software has been added to SmartPABX. This section will detail how to use your PABX to automatically record incoming call details from clients and generate invoices for those clients using Xero. In order to use this feature, you will need a login for your Xero account and an organisation you wish to connect to.
Setting Up
In order to access a Xero organisation, you will need to start off by clicking on the Xero module in your SmartPABX. This will give you a button which will allow you to securely log into your Xero account. Once you have logged into your account, select the organisation you wish to use with your SmartPABX and press the authorise button. This will then return you to the PABX. After this, you will be able to access your Xero features.

Features
 Contact Sync
In order to get a list of all of your contacts from Xero into your SmartPABX, click on the Contact Sync module, and then on the Sync Contacts button. This will look through all of your contacts in Xero and add them into the SmartPABX. Once this has been done, you will be able to see incoming clients’ names on your handsets as they call you, and be able to bill them for the duration of calls. New clients will be added to your SmartPABX automatically from Xero.
Overdue Customers
This section will allow you to look up all clients in your Xero contact list who have an overdue balance and assign automated calls to them. For each client who you wish to have called automatically, select the frequency of when the calls are to be, choose the number to be called, and press Submit.
Contact Sync
In order to get a list of all of your contacts from Xero into your SmartPABX, click on the Contact Sync module, and then on the Sync Contacts button. This will look through all of your contacts in Xero and add them into the SmartPABX. Once this has been done, you will be able to see incoming clients’ names on your handsets as they call you, and be able to bill them for the duration of calls. New clients will be added to your SmartPABX automatically from Xero.
Overdue Customers
This section will allow you to look up all clients in your Xero contact list who have an overdue balance and assign automated calls to them. For each client who you wish to have called automatically, select the frequency of when the calls are to be, choose the number to be called, and press Submit.
 By default, customers are set not to receive reminder calls when they are overdue on an invoice; the calls need to be set up manually. For each customer, there are several options available to set.
- Number to Call: This is a drop-down menu with a list of phone numbers for that customer from your Xero organisation, which can be used to set which number will be dialled for the automatic reminder. If the customer has no numbers in your Xero organisation you will need to update it with at least one before you can set up a reminder call for them.
- Frequency: The frequency of how often the customer will be called – daily, weekly, monthly, a set interval of days, or never. By default this is set to never. If set to interval, the first call made will occur from however many days you set from the present day.
- Time to Call: The time of day, in twenty-four hour time, which the customer will be called at. By default this is set to 9 AM. Due to the number of calls a line can support, depending upon the number of customers who have to be called at the same time, they may not all be called at precisely the time set.
- On: Which day the customer will be called on. For frequencies of weekly and monthly, the day of week and date respectively will need to be selected from the drop-down menu. For an interval period, the number of days as a whole numeric number will need to be put into the box. This can be left blank for frequencies of never and daily.
- Call on Weekends: Whether or not weekends should be ignored. Ticking this means that calls will go through on Saturdays and Sundays.
After your desired options have been set, you can press Submit to set up the automated call for that customer. Every time the appropriate time is met, the customer will receive a call reminding them of their overdue invoice. You can set the details of what the call will say with an IVR (see Call Settings).
Once a customer no longer has an overdue invoice, automated calls for them will stop occurring, but if you wish to stop recurring calls for them prior to them paying their overdue bills, simply set the frequency of calls for that user to never.
If you wish to apply the same overdue call setting to all customers at the same time, there is a section at the bottom of the screen for doing so. Note that if this is used, the first number set for each number will be used as the number to call, so if you need the call to go to a different number, you will have to set it manually.
Call Settings The call settings page allows you to set certain miscellaneous features
- Overdue Call Settings: This will allow you to set what happens when a customer receives an automated call reminding them of their overdue bills. The default option will call the client play a message explaining what the call is, and then read through the details of each of their overdue bills. It is recommended that you set overdue calls to go to an IVR.
- Pay by Phone: This will allow you to choose the account payments go to for phone payments using Secure Pay. This is compulsory for using Secure Pay as a feature.

Charging Clients
Client List
Billing clients for their calls can only be done whilst logged into SmartPABX on an extension. In order to find unbilled clients, click on the Time Billing section of the navigation bar. This will present you with a list of clients who haven’t been billed for their calls.
 If the same time billing activity can be used for all unbilled calls, select it from the drop-down list at the bottom of the page and press Generate Invoice. This will generate an invoice for each unbilled call for each client, and put it those invoices through to your Xero organisation.
If each client needs to be billed separately due to different calling rates, click on their name or the company name to be taken to a separate page for the billing.
Billing Individually
 Upon clicking on a client’s name and being taken to a new page, you will be given a list of their unbilled calls, with the date it occurred and how many they minutes the call lasted being displayed. In order to charge for a specific call, type in the rate per hour you wish to charge for the call, select a due date for when the invoice is due by, select an Account and Tax Rate for the invoice, and then press the Generate Invoice button.
If there is a specific call which doesn’t need to be charged for, press the Ignore button adjacent to that call.
If all unbilled calls can have the same details applied to them for this client, simply type the necessary information into the form at the bottom, and press Generate Invoice. After the necessary invoices have been generated, it is assumed that someone working with Xero will fill out any additional details before sending the invoice to the client.
Client Account IVRs
Integration As another Xero feature for your SmartPABX, you have the option of setting up IVRs to allow customers to check details of their account. If you need assistance setting up IVRs, see Configure IVR, as this section focuses solely on the Xero integration.
When adding an IVR, if you have Xero enabled as a feature on your SmartPABX, you will see several additional options in an IVR action list.

Xero Customer Account will, when reached on the IVR list, read the caller’s phone number, look them up in the database to see whether or not they exist, and if they do, find their Xero account details, then read out the total amount of money they currently have to pay to the user.
When Xero Customer Details is reached on the IVR list, it will look up the caller’s phone number in the database, and if they exist, it will go through all of their unpaid invoices. For each one, it will read aloud the amount they owe for that invoice and say when it must be paid by. Xero Overdue Invoices will look up all of the overdue invoices the caller has, and read out their details one-by-one.
Take Credit Card payment will allow callers to input a credit card and the details associated with it to the phone, which after being confirmed by Secure Pay, will make a payment and mark that invoice as being paid. Making a payment by credit card will automatically use the oldest invoice for that client for payment.
Note that if a caller is dialling from a phone which has not been billed or is not in the database, then the system will be unable to find them. They need to call from the same phone as they previously have. An IVR showing an example of how to allow customers to access each feature by pressing different buttons on their phone is shown below.

Sub Admins
Overview
The sub admins feature allows for creation of sub administration accounts. These accounts are similar to the default admin account, but can have SmartPABX features turned on or off. The sub admin feature can be accessed via the Sub Admins button on the dashboard after logging in.
Manage Sub Admins
Overview
From the Manage Sub Admins page you will see a list of all your sub admin accounts, a button to edit their details, a button to update their permissions, a button to delete the sub admin account and a button to add a new account.

Add a Sub Admin
To create a new sub admin, click on the ‘Add’ button listed on the Manage Sub Admins page. From here you will be taken to the creation screen.
A sub admins can have the following details specified (all fields are required):
- Username – Needed to login to the account.
- Full Name – A user friendly way to know who the account bellows to.
- Email Address – Used for password recovery. Must be a valid email address.
- Password – Needed to login to the account. Must be 5 character or more in length.

Update a Sub Admins Details
After creation, a sub admins details can be updated by clicking the ‘Edit’ button on the Manage Sub Admins page. From here you will be displayed with a form with the user’s current details. Pressing the ‘Update’ button below the form will save any changes made.

Reset Password
Passwords can be reset for sub admin accounts from the Update/Edit page. Clicking the ‘Reset Password’ button will prompt you with a confirmation message. After pressing OK, an email will be sent to the accounts associated email address with a link to reset their password manually.
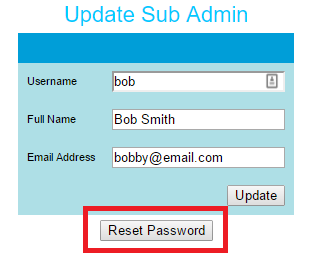
Permissions
The main reason to have sub admins accounts is to restrict what access they have to the SmartPABX interface. By pressing the ‘Permissions’ button on the Manage Sub Admins page, you will be presented with a list of groups and the access level the associated account has to those groups (on or off).
Permissions - Group/Feature Association
Each related feature can be found within this manual

This list is likely to change when new features are added
Active Directory LDAP
Introduction
This section of your PABX can be used to automatically sync users’ details from Active Directory to your PABX. In order to sync the details, you will need to set up an LDAP connection beforehand. To access this section, click on the LDAP Settings button on the main page of your PABX.
LDAP Settings
 When you initially access your LDAP Settings section, you will be presented with the above form. This form can be used to set up your connection to Active Directory. The fields refer to the following:
- Description: An optional description for this connection
- Host: The host address of the Active Directory instance you are connecting to. This should be an IP Address.
- Port: The port to connect via. By default this is set to 389.
- Alt Host: An alternative host address to connect to if the initial one fails.
- Alt Port: An alternate port to connect via if the initial one fails.
- Domain: The domain of your Active Directory. This should be a name, such as examplehost.local.
- Username: The username of the account to log into Active Directory with.
- Password: The password for the account that is connecting.
- Timeout: The optional time in seconds to try connecting before failing. If left blank or set to zero the timeout will be unlimited.
- Automatically Sync: If checked, Active Directory’s details will be synced with your PABX’s once every hour.
Of the fields, the Host, Port, Domain, Username, and Password ones must be filled out before a connection can be set up. Once you’ve filled out the necessary fields, pressing Update or Test Connection will save your settings. If Test Connection has been pressed, your PABX will also attempt to connect to Active Directory to ensure that it will be able to sync correctly, and display any errors if it cannot.
Mappings
 By pressing the Mappings button at the bottom of the LDAP Settings page, you will be taken to a page where you can set which fields from Active Directory will be synced to a corresponding PABX field.
- Extension Field: This is the field in Active Directory which will be compared to each extension. If the value of that field for a user in Active Directory matches an extension number, that extension will be updated with that Active Directory user’s details. By default this is set to IP Phone.
- Extension Comment: The comment set against an extension.
- Outbound DID Display: The value to be set for that user’s caller ID on outgoing calls. Note that if this value in Active Directory is not a DID that exists in your PABX, the Outbound Caller ID field in the PABX for the corresponding extension will not display the value, although it will still be set correctly.
- Web Password: The password for the extension to log into the PABX’s web interface.
- Voicemail Email: The email for the extension to receive voicemails. If either this or the Voicemail PIN fields are set, then voicemail will be set to be enabled for that user’s extension.
- Voicemail PIN: The PIN to be used by this user to access their voicemail.
- Personal PIN: The Personal PIN to be used by this user.
- Forward calls to: The number for calls to be forwarded to for this number.
- DID Redirect: If this is checked, then if the Telephone field for a user in Active Directory matches a DID in your PABX, that DID’s action will be set to GotoExtension and the value will match the extension’s number.
If the Active Directory Field value is set to Other telephone number, Other web page, Other home, Other pager, Other mobile, Other fax, or Other IP Phone and the corresponding Active Directory field has multiple values in it, the value used for the PABX will be the first value for that Active Directory’s corresponding field.
Aside from the already existing fields in Active Directory, you can also define custom fields that you have previously created in Active Directory for each field to be mapped. To do this, type in the name of the field (the attribute name, not the display name) to the Custom Active Directory Field field below the PABX field you wish to apply the custom field to.
If you do not wish for a particular PABX field to be synced with Active Directory, simply leave that option as N/A and that field won’t be changed.
Syncing
To sync details from Active Directory to your PABX, you can check the Automatically Sync option on the LDAP Settings page. If this option is set, the PABX will sync with Active Directory once each hour. Alternatively, if you press the Manual Sync button, the PABX will do a sync immediately.
IVR Queries
Introduction
The IVR Queries section of your PABX can be used to set up options for your clients and customers to answer over the phone. This is similar to the Campaign section, but unlike the campaign section, answers here do not need to be pre-defined, and after the data has been created, it can be sent to your Microsoft SQL Server or email address.
Setting Up
To begin setting up queries for people to answer over the phone, begin by going to the IVR Queries section of your PABX. Here, you will see the option to add queries, set up data retrieval, and map IVR queries to your Microsoft SQL Server.

Adding Queries
To add a query, press the Add Query button. This will take you to a simple form. This form has the following fields:
- Description: A description for the query
- Audio file: The audio of the question being asked. Note that once a client has finished typing in their answer to their phone, they will need to press the hash key to complete their entry, so this prompt should also be included in the audio file.
- Customer Confirm: If this is checked, then after a user has typed in their answer to the query, it will be read back to them for confirmation. If they have entered it incorrectly they can press 1 to re-enter the number, or 2 to continue to the next IVR option.
- Queue Redirect: When answering a query, a user has the option to immediately direct to a queue by pressing the asterisk (*) button on their phone, followed by the hash key. This is useful for if a user cannot continue in an IVR because their ID cannot be found in the database (see below) and they wish to speak to someone in a queue about this. In order to set the queue which the query the user is answering will redirect to, choose a queue from the list presented here.
- Database Check: If this is checked, then when a user inputs their answer, it can be checked against a database to see whether it exists. This is useful for if you want something such as a user ID to be entered and want to ensure that it exists before the user inputs it. If you check this box it is assumed that you already have a working connection to Microsoft SQL Server (see the Data Retrieval section below).
- Table Name: If you have selected the Database Check option, you will need to enter the table name where the data is to be looked up.
- Column Name: If you have selected the Database Check option, you will need to enter the column name in the above table where the data is to be looked up.
- Database Audio File: If the input a user puts in cannot be found in a table, you can set your own audio file to be played to the user to inform them that their entry could not be found and that they need to try again. If you leave this blank, an automated message will be played.
As an example for the database check, if you have users stored in a table called users and the column used for identifying them is user_id, you would put users into the Table Name field and user_id into the Column Name field. When the user inputs their ID, it will look up all user_id values in the users table where the user_id value is equal to the input value. If it finds at least one value, then the answer will be saved and the IVR will continue.

Once you have added a description to the question and selected a file, press the Add button to add this query to your PABX. If you need to change any details of a query later, you can simply press the Edit button for that query in the list of queries, which will take you to a form where you can change them. If you wish to delete a query, simply press the delete button for that query in the list of overall queries.
Adding Pre-Defined Answers
In addition to queries in which a user enters their answer dynamically, you can also set your own answers in IVRs. This is useful for showing when a user has selected a particular option in the IVR that does not require a prompt or which requires action at the same time that they select their choice. In order to add your own pre-defined answer, press the Add Answer button in the IVR Queries section. This will take you to a form for creating your own answers. This form has the following fields:

- Description: A description of the answer
- Field: If you intend for this value to be inserted into a database, this will be the field this value will apply to. (The table the field is part of is assumed to be the same as the table associated with the IVR in which you will be using this pre-defined value - see below for associating IVRs with tables). If you intend on retrieving data via email, it is suggested you make this a uniquely identifiable value for association with this answer
- Answer: The answer to either be inserted into your database or displayed in an email.
Adding Queries to an IVR
To add a query to an IVR, simply choose the Query option in the Action list, and then select the relevant query. When a user reaches the relevant option in your IVR, they will hear the audio file you have assigned to that query and be prompted to type in their answer using the dialpad. For obvious reasons, it is assumed that any queries you wish to make accept only numerical answers. Once they have typed in their answer followed by the hash key, they will move to the next option in the IVR. If a user does not enter something within ten seconds, they will be prompted again. If after ten prompts they have not entered a value, the IVR will move onto the next option.
Below is a simple example of an IVR which asks users to input their customer ID, prompt users to enter the quantity of an item that they want, and then hang up.
 If you intend to redirect a user to a queue, extension, or other human-controlled endpoint, you can use the Append Caller ID IVR option to inform the person at the endpoint of one or more values the user has entered to help prepare them and make things faster for the user. In order to do this, select the Append Caller ID IVR option and a query which was previously asked in the IVR using the Query option. This will add whatever the user entered for that query to the caller ID displayed on a handset when the call is redirected. If you wish to add more entered query values to the caller ID you simply need to choose the Append Caller ID option after a user has entered the value you wish to add. Each value will be displayed after a hyphen and a space. The format of the caller ID is [IVR Name] - [Append Caller ID Value #1] - [Append Caller ID Value #2] -... for as many times as the Append Caller ID option has been applied in the IVR.
To demonstrate, if a user enters their ID using the value Enter Cust ID for the Query option and you wish to display this to someone whom is having this call redirected to them, simply select Append Caller ID and choose Enter Cust ID from the drop-down list of queries. When this call is redirected to the person who is receiving the call, they will see the caller ID as [IVR Name] - [Entered Customer ID].
In order to use a pre-defined answer in an IVR, simply select the Query Answer option, and the relevant answer you have previously defined. If you are adding your data to a database, then upon the data for this IVR being added to your database, the pre-defined answer you have added here will be added into its corresponding field for the record which other values in this IVR are part of. If you are receiving your data via email, it will simply be stated that this value was chosen by the user upon receiving the other relevant information from this IVR.
Data Retrieval
Emails
In order to retrieve data entered via IVR queries via email, go to the Data Retrieval section of the IVR Queries section. This will present you with a form, from which you can select either Email or MS SQL. Select Email, enter your email address into the Email Address field, and press the Update button. Provided the email address you have entered is correct, whenever a customer finishes a call which had them using one or more IVRs which contained the Query option, you will receive an email saying which questions were answered and what they entered for them.

Microsoft SQL Server
The alternative way to retrieve data is to have it inserted directly into your Microsoft SQL Server. If you are using this method it is assumed that your Microsoft SQL Server is directly accessible from your SmartPABX.
To begin setting up your data connection to Microsoft SQL Server, you will need to go to the Data Retrieval section of the IVR Queries section, and select MS SQL as the Retrieval Type. This will present you with a form with the following values:
- Server host: The host on which your Microsoft SQL Server is located. This is likely to be an IP Address.
- Username: The username to log into the database with. It is assumed that you are using an SQL Server Authentication login for this, and that this user has access to write to whichever tables you intend to use this feature with.
- Password: The password to be used when logging in with the above username.
- Port: The port your Microsoft SQL Server is listening for incoming requests on. If you are not sure of this value, you can find it in SQL Server Configuration Manager under the SQL Server Network Configuration section.
- Database name: The name of the database containing the tables you intend to insert data into.
Once you have filled out all of this information, press the Update or Test Connection button to save your settings. If you press the Test Connection button then in addition to saving your values it will also do a check to see whether it can connect to your Microsoft SQL Server. If all of your details are correct upon pressing Test Connection but you are receiving an error, then it is likely that your Microsoft SQL Server is not accessible from your SmartPABX and thus you cannot use Microsoft SQL Server as a method for data retrieval.
 Once you have completed your initial settings for connecting to your Microsoft SQL Server, you will need to set up details for which fields in which tables will have data inserted into them. To begin, return to the main IVR Queries page and press the Database Mapping button. This will take you to a new page.
You will be presented with a form which allows you to set a corresponding field for each IVR query you have previously set up. The value you enter is the name of the field which this data will be inserted into (for the tables which contain these fields, see below). For example, let’s say you have a query with the description Enter Customer ID, which prompts users to enter their customer ID and reads the value entered. If you had a table (or tables) with a field named customer_id, where you intend to store this data, then for Enter Customer ID’s database field, you would enter customer_id.
If you have a query which you intend to use for a recurring field over multiple tables, then you will need to ensure that those fields are all named the same in each table. If those fields do not have the same name, then you will need to create separate queries for each unique field name, so that you can specify the field name for each query.
 For specifying the tables which you will insert data into, there is a form below the field mapping section for mapping IVRs to tables. A list is presented here of each IVR which currently has at least one Query option in it. Due to the nature of the database inserts to be done, it is assumed that each IVR will be used for inserting into only one table.
For each IVR listed, type in the name of the table which data will be inserted into. When a call to an IVR with queries has completed, for each query in that IVR, it will attempt to insert the entered answer for that query into the corresponding field set up in the field mapping section for the table this IVR uses.

Database Insertion Example
To illustrate how database insertion works, let us assume you have a simple table in your database called [dbo].[order] with the following fields, of which id is the Primary Key and an autoincrementing value:
| id | customer_id | quantity |
|---|---|---|
| int(11) | int(11) | int(11) |
Let’s say that you wish for users to be able to enter an IVR, type in their customer ID and the quantity of a pre-defined item you stock, and have it automatically entered into this table. After recording the appropriate sound files and creating queries, your IVR would be set up like so:
You would then have to set up the corresponding fields for those queries, like so:
Finally, you would need to set which table this IVR inserts data into. Assuming that the IVR is named Order_IVR, you would enter the name of the table for this IVR, which would be [dbo].[order].
 Whenever this IVR is completed and a user has entered all of the necessary data, it will insert into the table [dbo].[order] the values entered for each query. For each answer, it will look up that answer’s query’s corresponding database field, which is assumed to be an existing field in the table specified for this IVR.
If you wish to insert data into multiple tables whilst still within the same call, you will need to set up a separate IVR for each table you wish data to be inserted into, and use the GotoIVR option within each IVR to redirect to the next necessary IVR. As each IVR will only insert data into your database for the answers to the queries contained within that IVR, you may need to use a query in one IVR which has already been used in a previous one in that call – for example, reading a customer’s ID.
If your database connection is set up correctly but you are not receiving data to your tables, it is likely that you have entered your table or field names incorrectly. If this is the case, run a simple SQL query in Microsoft SQL Server to check the exact format of your table names and database.
AMI Users
Introduction
It is possible to add users to your PABX for the Asterisk Manager Interface, which will allow you to remotely send commands to your PABX if you are familiar with Asterisk. This can be set up in the AMI section of your PABX.
Creating and Managing AMI Users
In order to add an AMI user, head to the AMI section of your PABX, and press the Add User button. This will take you to a new form for adding a user.
 The following fields need to be filled out:
- Permitted IP Addresses: Any IP addresses which are allowed to log in as this user, including the subnet mask. If you wish for multiple IP addresses to be used for this user, you may separate the entries by using commas. For example, 192.168.1.0/255.255.255.0,192.168.2.0/255.255.255.0.
- Read Permissions: The permissions for what this user can read in Asterisk. Each permission manages the following:
-
- System: General information including commands such as Shutdown, Restart, and Reload.
- Call: Information about channels and ability to set information in a running channel.
- Log: Read-only logging information.
- Verbose: Read-only verbose information.
- Command: Permission to run CLI commands.
- Agent: Information about queues and agents and ability to add queue members to a queue.
- User: Permission to send and receive UserEvent
- All: All of the classes above
- Write Permissions: As above
After you have filled out the necessary information for this user, press the Add button to add them. A randomly generated username and password will be created for this user. For security reasons, neither of these can be changed.
To edit a user, on the main page for viewing AMI users, press the Edit button by a user's name. From here, you can change whatever details you want and then press the Update button to save those changes.
To delete a user, on the main page for viewing AMI users, press the Delete button by a user's name. After confirming that you wish to delete this user, they will be removed.
API
Overview
The SmartPABX also comes with its own API. It can only be accessed if the API feature is enabled on your SmartPABX. Using the API gives you the ability to interact and update information from an external source.
For full documentation on how to use the API, please refer to http://XXXX.voippabx.com.au/api/v1/, where 'XXXX' is your SmartPABX's name.
API Users
To be able to access the API, a unique user must be created to authenticate with. Clicking the 'Add API User' button will present you with a screen to fill in a new users details.
Username
- Used to authenticate a user (along with their password)
Password
- Used to authenticate a user (along with their username)
Restrict to IP Address
- You may add up to 2 IP addresses that you would like to restrict API request to from a particular user. If a request is made to the API from a foreign IP address, the request is rejected. These fields may be left empty if you do not want to restrict access to certain IP addresses.
Dropbox
Introduction
If you wish, you may enable your SmartPABX to automatically upload recordings to your Dropbox account each night. In order to do this, go to the Dropbox section of your SmartPABX. You will be presented with a button to securely log into your Dropbox account.
 Once you have logged in and given permission for the SmartPABX File Syncer to access your Dropbox, you will be returned to your SmartPABX. You should now have a set of different options, as well as information about your Dropbox.
If you wish to use a separate Dropbox account for uploading files to other than the one currently authorised, you will need to press the Deauthorise User button, then repeat the process above. Note that if you are currently logged into Dropbox on the browser which you are using your SmartPABX with, you will by default authorise it when you press the button, and so you must log out independently before allowing another user to authorise their Dropbox.
Only one Dropbox account may have files uploaded to it at a time. If you wish to upload your recordings to multiple users' accounts, you will need to set sharing permissions on the folder(s) your recordings are uploaded to.
Settings
Below your Dropbox details are a set of options

- Folder Name: The name of the folder your recordings will be uploaded to. If left blank, they will be put in a new folder called SmartPABX Recordings. If you wish to use multiple folders; for example SmartPABX Recordings/Daily Uploads then simply separate the folder names with a forward slash ("/"). If the folders you enter do not already exist they will be created for you.
- Sub Folders: If you wish to have the recordings for each day separated into their own separate folders, tick this box. By default, this would put recordings made on the 1/1/2016 into SmartPABX Recordings/1-1-2016, recordings from 2/1/2016 to SmartPABX Recordings/2-1-2016, and so on and so forth. If this is not ticked, all of the files would be placed into the SmartPABX Recordings by default.
- CSV File: If this is selected then for each day in which recordings are uploaded you will also receive a CSV with details about each recording. The CSV will be named Date-Month-Year.csv for the date which it refers to.
- Recording Range: If this is set to Daily then each night you will receive all recordings for the previous day. If this is set to All then each night you will receive all recordings in your SmartPABX. This option is useful for retrieving recordings for days prior to setting up your Dropbox integration with your SmartPABX.
Google Drive
Google Drive
If you wish, you may enable your SmartPABX to automatically upload recordings to your Google Drive each night. In order to do this, go to the Google Drive section of your SmartPABX. You will be presented with a button to securely log into your Google account.
 Once you have logged in and given permission for the PABX Recording Uploads to access your Google Drive, you will be returned to your SmartPABX. You should see a screen similar to the following:

If you see this screen, then each morning you will receive recordings in your Google Drive account. The files will be uploaded to a folder called SmartPABX Recordings (which will be created if it doesn't exist). In addition to the recordings, a CSV file will be uploaded containing details on the files uploaded that day, with the CSV's filename designated which files were uploaded that day. For example, a CSV called 2017-11-30.csv would contain details about the files uploaded on the 30th of November, 2017.
If you wish to use a separate Google account for uploading files to other than the one currently authorised, you will need to press the Deauthorise User button, then repeat the process above. Note that if you are currently logged into Google on the browser which you are using your SmartPABX with, you will by default authorise it when you press the button, and so you must log out independently before allowing another user to authorise their Google account.
Call Costs
Overview
It is possible to receive emails and generate CSV files containing details about your calls. These call records can also calculate Broadband Solutions' cost of your calls, which can be used to predict your bills or to calculate the price of calls for other offices which use your PABX.
In order to access the settings for your call records, go to the Call Costs section of your PABX. You should see an interface similar to the one below:
 The settings are as follows:
Local/National Call Flagfall: The cost to initiate a call to a national number
Local/National Call Rate: The cost for each increment of this call to a national number.
Local/National Call Increment: The increments in which a call to a national number charges. For example, if this is set to thirty, then for each thirty seconds that this call goes for the local/national call rate will be added to the cost of the call.
Mobile Call Flagfall: The cost to initiate a call to a mobile phone.
Mobile Call Rate: The cost for each increment of this call to a mobile phone.
Mobile Call Increment: The increments in which a call to a mobile phone charges.
1300/1800 Call Flagfall: The cost to initiate a call to a number beginning with 1300 or 1800.
1300/1800 Call Rate: The cost for each increment of this call to a number beginning with 1300 or 1800.
1300/1800 Call Increment: The increments in which a call to a 1300 or 1800 number charges.
Call Cost Emails: You may put a comma-separated list of email addresses into this field. The emails in this field will be sent CSV files containing the details of the call range selected (see below).
Call Cost Range: If Daily is selected, then each morning a CSV file containing the details of calls from the previous day will be sent to each email address added in Call Cost Emails. If Monthly is selected, then on the first of each month a CSV file containing the details of calls from the previous month will be sent to each email address added in Call Cost Range.
These values can be changed if the cost of calls on your PABX are different to the default values, but they will not affect your call costs. These are for display and calculation purposes only. Furthermore, errors can occasionally occur in the calculation of them, so if the values given when calculating call costs is different to the value given on your bill, you should always assume that the value on the bill is correct.
In order to use call costing correctly, each extension whose calls you wish to record the details of will need to be part of a group. In order to add an extension to a group, go to that extension's settings and find the Group option. From there, you can select a group for that extension to be part of, or add new groups with the Edit list option.
In addition to receiving emails, you can also export call details by using the Export Yesterday's Calls and Export Last Month's Calls buttons at the bottom of the page. As the name suggests, using the Export Yesterday's Calls button will generate a CSV file of calls and their details for the previous day. The Export Last Month's Calls button will generate a CSV file of calls and their details from one month ago to the previous day.
Number Extensions
Number Extensions
With the number extensions feature enabled, you can configure shortcut keys for your handsets.
 For each number, you can select one of the following options:
- Go to IVR: Go to an IVR
- Go to Extension: Go to an extension
- Go to DID: Dial a DID
- Go to Queue: Go to a queue
After selecting an action for each number, you can select the value that applies to that number. After pressing save and applying the changes, the shortcuts will be applied. To use a shortcut, simply dial one of the configured numbers and it will go to the value you have configured.
Night Switch
Overview
Night Switches are settings that can be used to redirect a large number of extensions, DIDs, and single-number shortcuts to a particular number. A night switch can be turned on and off by dialling *30 on a handset on your phone. This is useful for if you wish to quickly turn off and on redirects after-hours.
Creating a Night Switch
To create a night switch, press the Create button on the night switches page. You will be presented with a form with the following details:
- Description: A description for this night switch.
- Redirect Number: The number you wish to redirect to.
- Extensions: The extensions you wish to redirect to the above number. This should be a comma-separated list - for example, 9001,9002,9003.
- Toggle Number: The number to dial in order to turn this night switch on or off. You cannot select a number that is already in use by another night switch or as a login or logout code for a queue.
After filling out the form, press the Create button to create this night switch.
Edit Night Switch
You can edit a night switch by pressing the Edit button next to the night switch you wish to edit. This will present you with a form similar to the one for creating a night switch.
- Description: A description for this night switch.
- Redirect Number: The number to redirect to.
- Extensions The extensions you wish to redirect to the above number. This should be a comma-separated list - for example, 9001,9002,9003.
- Toggle Number: The number to dial to turn this night switch on or off. You cannot select a number that is already in use by another night switch or as a login or logout code for a queue.
- Status: Whether this night switch is on or off. If it is on, then dialling the configured numbers will redirect them to the specified number. If this is off, all configured numbers will work as per usual.
You can save your changes by pressing the Update button. It is recommended that you only edit night switches whilst they are off.
You can add a DID to a night switch by selecting it from the DIDs section and pressing Add. Any DIDs can be removed from this night switch by pressing the Remove button next to it. Any DIDs shown here will be redirected to the redirection number whilst the night switch is on, and cannot be edited whilst it is on.
The same can be done for single digit shortcuts by ticking the shortcuts you wish to have redirected whilst this night switch is on. To remove a single digit shortcut from this night switch, simply uncheck the shortcuts you no longer wish to have redirected and press Save. It is recommended that you do not use any DIDs or single digit shortcuts for more than one night switch.
Delete Night Switch
To delete a night switch, press the delete button next to the night switch you wish to delete. After confirming the deletion, the night switch will be removed. It is recommended that you turn off a night switch before deleting it, although if you do not, it will turn itself off before deletion.
Night Switches in IVRs
Night Switches can be controlled in IVRs with the following options:
- Night Switch Redirect: If the selected night switch is currently turned on, the user will be redirected to the selected IVR. If the selected night switch is currently turned off, the IVR will continue to the next IVR action.
- Night Switch On: This will turn the selected night switch on. If the night switch is already on, no change will occur.
- Night Switch Off: This will turn the selected night switch off. If the night switch is already off, no change will occur.
Windows Reception Console
Introduction
Using the SmartPABX Reception Console, you are able to use your Windows PC to control your extension in a variety of ways as well extend the functionality of your PABX system through a number of ways including:
- Contact Directories
- Outlook, Microsoft/Office365 Account & Google Account integration
- Call Logging with Integrated Notepad
- SmartLink contextual URLs
- Extension Monitoring & Filtering
Setting Up
To use the Windows Reception Console you must ensure that you have the following:
- The URL of your SmartPABX Online Console
- Your extension number (usually in the numbered format of 9xxx)
- A web password (this is different to your extension password)
With these credentials, you will be able to login to the program;

Note that if your login is successful, the application will save the login details for future.
For security purposes you do need to login with every launch of the application but this is something that is obviously made much less cumbersome with the addition of the saved users.
Dialler

The Dialler can be used to call phone numbers through your application as well view recent calls and run basic tasks. Using either the dialpad in the bottom corner or the universal input at the top of the page. You are able to type phone numbers directly into the bar as well as contact names.

Options will appear as you type, you can run the first available option by pressing enter.
The Dialler also allows you to view the calls that have been made through the application and any notes taken during these calls can be edited and saved.
Note that calls made using the physical handset will be shown in the application unless the setting is turned off.
Extensions Overview

The Extensions view is a live display of all the extensions in a SmartPABX network. Using the view you are able to view the current state of all extensions, filter extensions by group and status as well as call extensions using the applications dial interface.

Clicking an extension's tile will show a minimal pop-up that displays the status and call button for the extension. Like the view, the pop-up will stay updated to the PABX and requires no restart or re-opening in order to stay up to date.
Extension Filters and Groups
Status Filters

The Extensions window comes with the ability filter and group extensions very easily, allowing for specific monitoring depending on certain criteria.
By default, you are able to filter extensions based on their status easily using the checkboxes on the side of the view. Multiple statuses can be selected and as expected these filters will be populated in real time as updates are made.
Extension Groups

SmartPABX systems have always had extension group functionality and these same groups are available within the SmartPABX Reception Console. Groups from the PABX will populated on the program startup and selecting these groups act like a filter, only showing extensions in the group selected.
Extension groups can be created in the console and the changes will be pushed to SmartPABX system. Extensions can only be assigned to one group at a time so be aware of this when creating or modifying extension groups. You can modify an existing extension group by right clicking the group in the list.
Show Filters In New Window

Right clicking either the status filter or extension groups list will allow you to view the currently selected filters in a new window. This will open a separate window from the main one with all the extensions displayed which abide to the filters selected at the time.
The window is completely resizeable and flexible, allowing for easy monitoring of extensions even when the main user interface is not visible.
Contacts

The reception console comes with a built in contact directory which allows you to call various contacts from within the application as you would in a typical phone directory. A contact is very flexible, the details of a contact allowing for you to enter any detail in with an associated value.

Creating a new contact is easy, selecting new contact in the bottom right hand corner showing a simple form which requires a name and a simple details modifier. Field names will auto-complete depending on existing fields in the contacts and these details can be modified after the contact is added just by right clicking the detail in the contact view.

Contact screens will automatically populate possible numbers to call depending on whether the program believes its a valid number.
Pinning a contact is good for popular contacts as this means the contact will stay available in the program's task bar icon for fast calling.

Importing Contacts from CSV
Contacts can be imported into the program by using a generated Comma Separated Value (.csv) file.

Clicking on More... in the bottom right hand corner of the Contacts page will show you an import window in which you can open a .csv file to import.
Importing Contacts from Account
The SmartPABX Reception Console also has support for importing contacts from Google and Microsoft Accounts. Both accounts work identically with how they behave, imports can be made by selecting Import from Account in the More... menu.

With this menu, there are technically only two accounts available with Outlook referring to the Office product you have installed on your computer. Clicking Setup on Microsoft/Office365 or Google will open a web browser window in which you authenticate SmartPABX with your account's contact directory.
Please note this does not give the application access to your account's user name or password, these are still kept by Microsoft or Google who also handle all authentication with the application.

Once an account has been linked, an Import button is added which will import all the contacts from the server. This can be done as many times as you want and the program will try to not import the same contact twice (however if the contact is edited locally this may be impossible)
The Outlook Application cannot be "set up" and so clicking Import will attempt to open the application in the background and if this application is set up all contacts from the local directory will be imported.
SmartPABX has the ability to have a background sync running for each of the accounts that have been set up. Clicking enable sync will allow the application to automatically import contacts on:
- Startup
- Every 30 minute interval whilst the application is open
This means that if you update the service's directory outside of the console, SmartPABX will ensure the directory in app is kept up to date.
Call Operations
The SmartPABX Reception console has the ability to manage calls from your desktop PC, including functionality such as parking, transferring and hanging up ongoing phone calls without the need to touch your physical SIP device.
The Call Window

When receiving or making a call, a call window will appear in the tabs of the application. By default, this window will require you to manually select it in order to see the incoming call however automatic focusing of new call windows can be enabled in the Call section of the preferences menu.
Taking Notes
The call window has a built in scratchpad for taking notes during the call. These notes are saved as you type and can be edited after the call has ended. If you select the timestamp option underneath the window, the current time elapsed of the call will be appended to the front of every new line of the note.
Call Transfers
![]()
Clicking the "Transfer" button will open up a transfer dialog in which the current call can be transferred to another number.
Extensions will populate the search box and special buttons below the screen, providing autocompletion for both the extension number and comment as you type. Despite this feature, calls can be transferred to any number that is typed into the box; both internal and external.
![]()
Transfers are not limited to the application however, areas like the extension menu providing the option to right-click-to-transfer on valid extension tiles.
Call Parking
Clicking the "Park Call" button will send the current call to the next available parking spot. This call can be retrieved again, however if the window is closed you will need to dial the parking spot manually using information from the "Workplace" section.
Workplace

The Workplace menu contains information relating to the organizational aspects of your SmartPABX.
Console Notes

Using the Workplace, you pin console notes to an extension for a time period. To add a note, use the dropdown menu located next to notes. Selecting an extension will show a new note prompt, asking for two times to set the note between. These fields support natural language such as:
- tomorrow 5pm
- friday night
- next week
After submitting the note it will appear in the notes section of the Workplace. Right click the note to edit its contents and times if necessary.
The note will disappear from the view after time has elapsed however you can manually remove a note by using the Archive button in the edit note screen.
Queues

The other major feature of the Workplace menu is the Queues list. All non-empty, active queues will be available to monitor in the SmartPABX reception console; details such as waiting callers and the status of each queue member updating in real time.

If you want to hide a queue from the queues list, you can do this by clicking the hide button which appears in the queue elements upon mouse over. Note that if you want to show a queue again you can do this by editing the list saved in your call preferences.

If you select the Pop Out option you can view a queue in a separate, resizable window.
Parking Spots

Down the bottom of the Workplace menu you can see the current status of your PABX system's parking spots.
Call Wrap Codes
Introduction
If you have many extensions in queues answering customer enquiries, you may wish to report on the quantity of different call types customers are talking to your users about.This can be achieved via call wrap up codes.
Call wrap up codes are different ways of classifying what type of call a call was. Call wrap up codes consist of groups, each of which is associated with a queue. A queue can only have one call wrap up code group associated with it at a time. After a customer has hung up whilst talking with a person in a queue, if that queue has a call wrap up group associated with it, the person on the extension will be asked to press a button to record what type of call they just had.
Creating a Call Wrap Group
To create a call wrap group, click on the Call Wrap Codes section of your PABX and press the Add Call Wrap Group button. This will take you to a new form.
 From here, give the call wrap group a description, and then fill out what each call type corresponds to which button on a handset. For example, in the above screenshot, after the customer has hung up, the person on the extension will be prompted to press one to record the call as a purchase request, two if the call was a price enquiry, and three if the call was another type of call. You do not have to use each button in a call wrap group, or even use them in ascending order, but you must use at least two buttons in each call wrap group.
A call wrap group must be associated with a queue, or it will not work. You do not have to select a queue when creating a call wrap group, but it is recommended. A queue cannot be associated with a call wrap group if that queue is already associated with another call wrap group.
Other Call Wrap Group Options
In addition to creating call wrap groups, you can also delete or edit them.
In order to delete a call wrap group, simply select the Delete button on the Call Wrap Codes page next to the group you wish to delete. After confirming that you wish to delete that group, that group will be deleted.
In order to edit a call wrap group, press the Edit button next to the call wrap group you wish to edit. On the edit page you can change the description, button values, or queue a call wrap group is associated with.
Reporting on Call Wrap Codes
To see the results of call wrap codes, go to a report which has a queue associated with it. Click on the Call Wrap Data page to see the number of calls per group.
 You can change the queue or extension you are seeing data for by using the controls in the top-right. Additionally, you can change the range of data you're seeing using the controls at the bottom of the page.
If you cannot find the queue you wish to see data for, it is because it is not associated with the report group you're looking at.
If the user who took the call did not select an option for the type of call they had, that will be recorded as Call Type Not Specified.
Dashboard
Overview
It is possible to set up a number of dashboards on your PABX for the displaying of constantly updated data. The exact data being displayed and updated can be configured by you, with as much flexibility as you would like. You may wish to use a single dashboard to show an overview of your PABX and its stats, or you may prefer to use multiple dashboards with each giving more information about a particular extension or group of extensions. These dashboards are ideal for displaying in an easy to view location, such as a widescreen television, for constant data updates.
Dashboards
 In order to create a new dashboard, press the Add Dashboard button on the Dashboards page of your PABX. In order to create a dashboard, all you need to do is choose a description for the dashboard, and the number of columns used to display the modules. The description can be anything you want, provided the name is not already in use by another dashboard. Once you have chosen a name for your new dashboard, simply press the Create button.
If you wish to delete a dashboard you are no longer using, simply press the Delete button next to the dashboard you wish to delete. This will take you to a confirmation page. After confirming that you wish to delete this dashboard, it will be deleted. If deleting a dashboard, please ensure that you do not have any pages with that dashboard open prior to deletion.
If you wish to change the name of a dashboard, simply click Edit by the side of the dashboard you wish to rename, and then on the following page, choose a new name and press Update. This page will also allow you to create and modify the modules used by this dashboard.
Modules
Creating Modules
In order to create content for your dashboard, you will need to add modules to it. Each module is a small square which will search for and display data according to what you've specified. A dashboard will display all modules associated with it. In order to create a new modules, press the Add Module button after pressing the Edit button for a dashboard. This will take you to a new form.
 The meaning of each field is as follows:
- Description: The description of this module. This will be displayed as the title of this module in the dashboard.
- Report Type: The type of data this module will be looking up. Many of these rely on other settings in the module in order to determine the precision of the data being looked up. The different data types are as follows:
-
- Abandoned Calls: The number of calls unanswered in the selected queue today.
-
- Active Calls: The number of calls that the specified extensions are currently in.
-
- Average Call Time: The average length of calls for the specified extensions in the selected date range.
-
- Average Wait Time: The average amount of time users in the specified queue have had to wait today.
-
- Calls Made: The number of calls the specified extensions have made in the selected date range.
-
- Calls Received: The number of calls received by the specified extensions in the selected date range.
-
- Completed Calls: The number of calls received by the specified extensions which were answered.
-
- KPI: The number of minutes out of a specified amount the specified extensions have met within the selected date range. Note that this option will display the total number of minutes between all specified extensions. If you wish to see the KPI for a specific extension then it is recommended that you either only enter one extension for this module or use the existing feature in the reports system. In addition, this only looks up data for received calls, not outgoing calls.
-
- Queue Waiting: The total number of people waiting in the specified queue, as well as the details of the two members who have been waiting the longest.
-
- Total Call Minutes: The total number of minutes the specified extensions have spent in calls within the selected date range. This only looks up data for received calls, not outgoing calls.
- KPI: If selecting the KPI option for the report type, this allows you to specify how many minutes of talk time the specified extensions should be achieving within the selected date range.
- Refresh Time: The time in seconds of how long you wish this module to display data between refreshes. If the selected report type for this module is active calls, average wait time, or queue waiting, it is suggested that you set this to at least ten seconds, otherwise you may notice performance issues with your PABX.
- Date Range: The range of when you wish to look up data. If Today is selected, only data for today will be looked up. If This Week is selected, data from the most recent Monday (or today if today is a Monday) to the present day will be looked up. If This Month is selected, data from the first of the month (or today if today is the first of the month) to the present day will be looked up. A date range cannot be selected for active calls, average wait time, queue waiting, or abandoned calls.
- Extension(s): The extensions you wish to look up data for. This should be a comma-separated list, such as 9001,9002,9003.
- Queue: The queue you wish to view data for.
- Queues: If you wish to add all of the extensions in a queue to this module, simply tick the box next to the queues you are interested in. If you add or delete extensions from one of the selected queues, the module will automatically alter the extensions it is looking up data for.
- Ring Groups: If you wish to add all of the extensions in a ring group to this module, simply tick the box next to the ring groups you are interested in. If you add or delete extensions from one of the selected queues, the module will automatically alter the extensions it is looking up data for.
Note that many of these report types do not distinguish between internal and external calls when collecting data. In addition, calls that were placed to an extension via a queue may not have their data displayed depending upon the module.
Once you have selected all of the options for your module, press the Create button to create a new module.
Editing Modules
To edit a module, press the Edit button beside the module which you wish to edit. This will take you to a form which will allow to change any aspect of the module. Once you have made the necessary changes, press the Update button to save the changes to your module.
Deleting Modules
To delete a module, press the Delete button beside the module which you wish to delete. Once you have confirmed that you wish to delete the selected module, it shall be deleted.
Viewing
Once you have configured modules for your dashboard, you can view it by pressing the View Dashboard button at the bottom of the dashboard's edit page.
 Depending upon how long you set the refresh times for each module, it may take a few seconds to load in initial data.
If you notice issues with loading in data consistently, or find that your PABX is performing slowly whilst your dashboard is up, try removing some modules or increasing the refresh time for each module.
Paging Groups
Overview
In addition to paging all phones (dial 99) and paging a specific phone (dial 888 followed by the extension you wish to page), you may also set up custom paging groups. These groups allow you to page a custom number of extensions, which you can organise however you would like. For example, you may wish to put all extensions used by sales representatives into a paging group so that you can page only your sales representatives. This section of the manual will explain how to set up and manage paging groups.
Create Paging Group
In order to create a paging group, press the Create button on your Paging Groups page. You will be presented with a form with the following details to be filled out:
- Group Name: The name of the paging group you will be creating. Names must be unique amongst paging groups.
- Number: The number to dial in order to page the group.
After you have created a paging group, you will be able to add extensions to it by editing it.
Editing Paging Groups
In order to edit a paging group, press the edit button next to the paging group you wish to edit. This will take you to a form with the following details, which you can change:
- Group Name: The name of the paging group. You can change the name of an existing paging group, but it must remain unique.
- Number: The number to dial to page all of the extensions in this group. This can be changed at any time as long as the selected number is not currently use.
In order to add an extension to this paging group, select the desired extension from the dropdown box in the Extensions section, and press Add. The selected extension will now be part of the paging group. All of the extensions which are currently part of the paging group will be shown below the dropdown.
In order to remove an extension from this paging group, simply press the Remove button next to the extension you wish to remove. This will remove the extension immediately.
Deleting a Paging Group
In order to delete a paging group, press the Delete button next to the paging group. You will be asked to confirm that you wish to delete the paging group. Once you have confirmed that you have, the paging group will be successfully removed.